

How to Organize a Small Nursery for a Newborn
Table of Contents
- Start With a Simple Floor Plan: Small Nursery Layout Ideas
- Zone 1: Build a Diaper Changing Station That Works
- Zone 2: Nursery Closet Organization Tips for Baby Clothes
- Zone 3: Use Vertical Storage for Baby Rooms and Save Floor Space
- Zone 4: Manage Toys and Feeding Supplies Without the Clutter
- Safety First: Rules for Organizing a Small Nursery
- Budget-Friendly Hacks for Organizing a Small Nursery
- Conclusion: Your Small Nursery, Ready for Baby
- Frequently Asked Questions
Last Updated: September 7, 2026
Start With a Simple Floor Plan: Small Nursery Layout Ideas
Organizing a small nursery for a newborn starts with a clear floor plan, not a shopping list. The goal is to fit every essential into a compact footprint while keeping the room calm and easy to move through. At Tender Tots & Wellness, we recommend sketching a rough layout before buying furniture.
The fastest way to organize a small nursery is to divide the room into distinct activity zones, preventing the space from becoming a dumping ground for mismatched gear. A typical nursery layout ideas approach groups related tasks: diapering in one corner, feeding near the glider, and sleep against the quietest wall.
When you only have a few feet of wall space, multi-functional furniture earns its keep. A dresser that doubles as a changing table, a crib with built-in storage drawers, and a slim shelving unit all maximize square footage. Skip the bulky glider if space is tight; a compact rocking chair or floor cushion works for feeding.
Zone 1: Build a Diaper Changing Station That Works
The changing station is the workhorse of any nursery, and in a small room it must be compact yet fully stocked. A dedicated changing table with a pure cotton pad cover keeps diaper changes comfortable for your baby and easy to clean for you. The American Academy of Pediatrics guidance on nursery safety stresses that everything you need should be within arm's reach so you never leave your baby unattended on the changing surface.

To organize a small nursery effectively, stock your changing station with a diaper caddy holding diapers, wipes, cream, and a change of clothes. This caddy can move from the changing table to the living room or nursery, making it a versatile piece of gear. Stack diaper sizes in clear labeled bins beneath the changing table, with the current size on top and the next size down below.
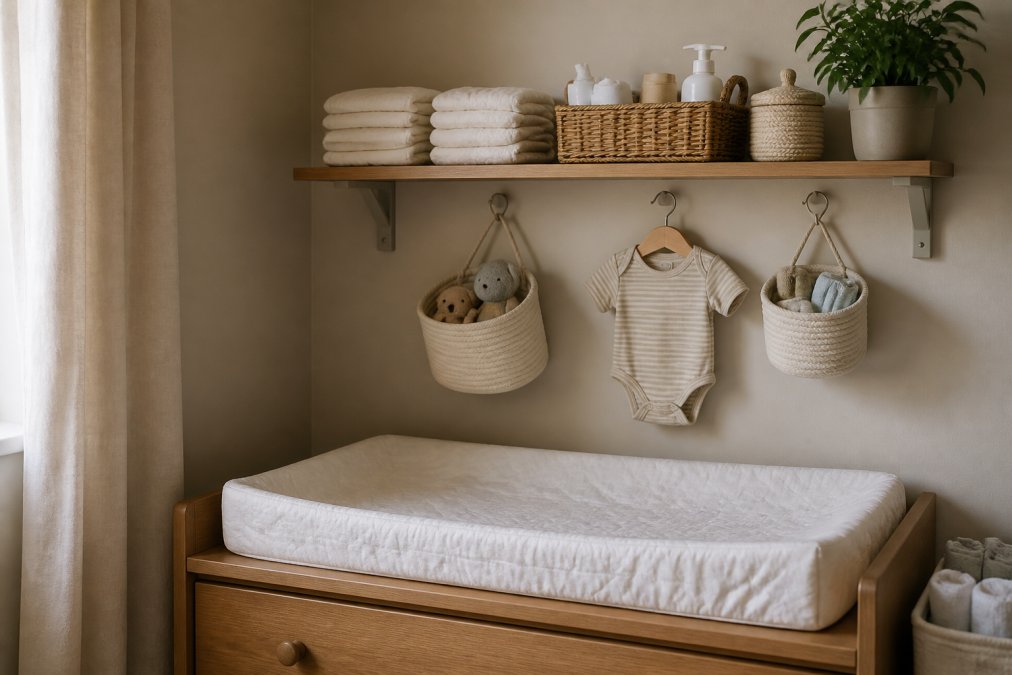
Avoid overstocking the station. You only need a two-day supply within reach; the rest belongs in a closet or under-bed bin. This habit keeps the surface clear and the routine fast, especially during middle-of-the-night changes.
Zone 2: Nursery Closet Organization Tips for Baby Clothes
Baby clothes are tiny but multiply quickly, and nursery closet organization tips usually focus on sorting by size before folding. Newborn sizes fit for only a few weeks, so separate everything by size and store outgrown pieces in labeled bins immediately. This prevents the drawer chaos of mixing 0-3 month onesies with 6-9 month sleepers.
Use closet dividers to mark size ranges on the hanging rod, and install a second lower rod so your baby can eventually reach their own clothes. Drawer organizers keep socks, mittens, and bibs separated, making getting dressed less of a treasure hunt. Canvas bins on the upper shelf hold outgrown clothing, extra blankets, and seasonal items.
The Inventory System That Prevents Over-Buying
Most guides stop at sorting, but the real problem in a small nursery is not knowing what you already own. A simple inventory system prevents duplicate purchases and keeps the closet from overflowing. Use a small whiteboard or phone note to track what is in each bin, for example, "Bin A: 0-3 month onesies (12), sleepers (8), socks (10 pairs)", and update it once a week during laundry. When you see a sale, check the list before buying to avoid stocking up on sizes you already have enough of.
The Outgrown-Box Workflow
Keep a single open box or basket in the closet labeled "Too Small." Every time you dress your baby and find something snug, drop it in the box immediately, do not fold it back into the drawer. When the box is full, transfer the contents to a labeled storage bin on the top shelf. This takes five seconds per item and eliminates the weekend sorting session most parents dread, keeping current-size drawers from becoming a mix of sizes.
Repurposing Household Items for Closet Storage
Before you buy anything, look around your house. A tension rod at the back of the closet creates a second hanging level for bibs, burp cloths, or upcoming sizes. Shoe organizers with clear pockets work perfectly for socks, mittens, and pacifier clips, hang one on the inside of the closet door. Cereal storage containers or large mason jars hold hair accessories, lotion bottles, and nail clippers. These budget-friendly DIY hacks cost nothing and keep the closet organized without adding plastic bins you will discard in a year.
Planning for the Toddler Transition
A newborn closet is not a toddler closet, and planning for that transition now saves you from reorganizing everything in eighteen months. Install the lower hanging rod at a height your toddler can reach later, around 36 inches from the floor, so you do not have to move it. Choose neutral canvas bins that will work for toy storage later, not pastel bins that will look out of place in a toddler room. When you sort outgrown clothes, label bins with the size range and season so you can find what you need without opening every box.
Safety Check: Anchor Everything
A closet is not exempt from safety rules. Anchor any tall dresser or shelving unit inside the closet to the wall studs, even if it seems stable. Keep diaper cream, wipes solution, and cleaning supplies on a high shelf or in a locked cabinet, never within your baby's reach. Check that the closet door cannot be closed from the inside by a curious toddler later, a simple hook-and-eye latch at the top of the door prevents this hazard. These steps are non-negotiable, especially in a small room where every piece of furniture is close to the crib.
Zone 3: Use Vertical Storage for Baby Rooms and Save Floor Space
When floor space is limited, the only direction left to build is up. Vertical storage for baby rooms transforms blank wall space into valuable shelving, one of the smartest ways to organize a small nursery. Floating shelves above the changing table hold burp cloths, lotions, and decor, keeping them accessible without cluttering the surface.
Wall-mounted shelving units and over-the-door organizers store toys, books, and extra supplies without taking up floor space. Use the inside of closet doors for shoe organizers repurposed to hold bibs, socks, and small accessories. A tall, narrow bookcase anchored to the wall provides storage for heavier items like diaper packs and baby gear.
Zone 4: Manage Toys and Feeding Supplies Without the Clutter
Toy storage and feeding supplies can overwhelm a small nursery faster than clothing. A rotation system is the most effective strategy: keep only a handful of age-appropriate toys visible and store the rest in opaque bins. This minimalist approach reduces visual clutter and keeps your newborn engaged with fewer options.
Designate one low shelf or basket for toys your baby can access during tummy time, and store the rest higher up. For feeding, dedicate a single shelf or caddy to bottles, breast pump parts, and burp cloths so everything is washable and within reach of your feeding spot. This makes late-night feeding sessions smoother and cleanup faster.
- Use clear, labeled bins for toy categories: rattles, teethers, soft blocks
- Keep a small drying rack for bottle parts near the feeding zone
- Store daily-use feeding items at waist height, not on high shelves
The Four-Bin Rotation System That Grows With Your Baby
A simple rotation system prevents toy clutter and keeps your newborn engaged without overwhelming them. Use four clear bins, each holding a small selection of age-appropriate toys. Label them Bin 1 through Bin 4. Keep only Bin 1 on the low shelf your baby can reach during tummy time; store Bins 2, 3, and 4 on a higher shelf or in the closet. Every two weeks, swap Bin 1 with Bin 2. This keeps toys feeling new and prevents the floor from becoming a graveyard of ignored rattles.
As your baby grows into a toddler, this same system scales: swap the bins more frequently, or increase the number to six. The bins themselves do not change, only the contents do. This long-term scalability means you are not rebuying storage every six months.
The Feeding Station That Prevents Bottle Chaos
Feeding supplies multiply faster than toys. A dedicated feeding station with a clear workflow prevents the 2 a.m. scramble for a clean bottle. Use a small plastic tub or caddy with three compartments: one for clean bottles and nipples, one for pump parts, and one for burp cloths. Keep the tub on a shelf at waist height near your feeding spot. After each feeding, rinse parts and place them in the drying rack. Once dry, return them to the tub. This cycle takes two minutes and keeps the counter clear.
The One-In-One-Out Rule for Feeding Gear
Feeding supplies multiply faster than toys. A dedicated feeding station with a clear workflow prevents the 2 a.m. scramble for a clean bottle. Use a small plastic tub or caddy with three compartments: one for clean bottles and nipples, one for pump parts, and one for burp cloths. Keep the tub on a shelf at waist height near your feeding spot. After each feeding, rinse parts and place them in the drying rack. Once dry, return them to the tub. This cycle takes two minutes and keeps the counter clear.
Repurposing Household Items for Toy and Feeding Storage
Before you buy another bin, check your kitchen and closet. A muffin tin works as a sorting tray for pacifiers, teethers, and small toys during tummy time. A hanging shoe organizer on the back of the nursery door stores bottles, nipples, and burp cloths, each pocket holds one item, so you can see at a glance what is clean. Ice cube trays hold small items like pacifier clips and hair ties. These budget-friendly DIY hacks cost nothing and keep the nursery functional without adding more plastic.
Safety Check: Toy and Feeding Storage
Never store toys or feeding supplies on shelves above the changing table or crib, anything within reach of your baby is a hazard. Anchor any shelving unit to the wall studs, even if it is low. Keep small parts like bottle nipples and pacifier clips in containers with lids, out of reach. Check toys regularly for loose parts or damage, and discard anything broken immediately. A clean floor is also a safety feature: it gives your baby a safe space to practice rolling and, later, crawling.
Safety First: Rules for Organizing a Small Nursery
Safety-first organization is non-negotiable in a nursery, and the constraints of a small room make it even more critical. Every piece of nursery furniture must be anchored to the wall to prevent tip-overs, and the crib must meet current safety standards with a firm mattress and no loose bedding. The Consumer Product Safety Commission nursery safety standards provide clear guidelines on crib design and safe sleep surfaces.
Keep all cords from blinds, monitors, and lamps well out of reach, and ensure any shelving above the changing area is securely mounted. Store diaper cream, wipes solution, and cleaning supplies in a locked cabinet or high shelf, never within your baby's reach. When you organize a small nursery, remember that a clean floor is also a safety feature: it gives your baby a safe space to practice rolling and, later, crawling.
Budget-Friendly Hacks for Organizing a Small Nursery
You do not need a designer budget to create a functional nursery. Repurpose items you already own: a sturdy bookshelf becomes a changing station, and tension rods inside a closet create instant dividers for hanging clothes. Clear shoe boxes from the dollar store work perfectly as drawer organizers for socks and accessories.
For long-term scalability, buy storage that grows with your child. Neutral canvas bins and simple shelving transition easily from a baby nursery to a toddler room, saving you from rebuying everything in eighteen months. A diaper caddy or the Large Capacity Mummy Baby Backpack from Tender Tots & Wellness keeps essentials organized at home and on the go without needing a second set of gear.

Conclusion: Your Small Nursery, Ready for Baby
Organizing a small nursery for a newborn comes down to three priorities: zone your layout, use vertical space, and sort relentlessly by size. A safety-first approach and a few budget-friendly hacks mean you can create a calm, functional room without a major renovation.
At Tender Tots & Wellness, we curate baby gear that blends timeless elegance with modern practicality, from pure cotton changing pad covers to spacious diaper backpacks. Our products are chosen to fit a modern family's needs at fair prices, with free worldwide shipping to make setup easier. Shop now and build a nursery that keeps you organized and your baby comfortable from day one.
Frequently Asked Questions
How do I organize a small nursery for a newborn when I don't have a closet?
Skip the traditional closet and bring in a freestanding shelving unit or wardrobe. Use canvas bins on the lower shelves for bulky items like blankets and use the upper shelves for clothes you reach for less often. A rolling garment rack works well for hanging onesies and outfits, keeping them visible and within easy reach without taking up much floor space.
What is the best layout for a small baby nursery?
The best layout puts the crib away from the window and any cords, then groups everything else into zones. Place the changing station closest to the door so middle-of-the-night changes are quick. Keep feeding supplies and a diaper caddy near the rocker or glider. This creates a clear traffic path and keeps the room functional even when space is tight.
How do you store baby clothes in a small nursery to make them last?
Sort clothes by size first, then store only the current size where you can see them. Use closet dividers to mark size ranges like 0-3 months and 3-6 months. Roll outfits instead of folding them so a drawer holds more and you can spot pieces at a glance. Store outgrown sizes in labeled bins under the crib or on a high shelf.
What are the best vertical storage solutions for a baby room?
Wall-mounted shelves above the changing table or dresser are the most effective vertical storage for baby rooms. They keep diapers, wipes, and burp cloths within arm's reach without using floor space. Over-the-door organizers work well for swaddles and bibs. Just make sure every shelf is anchored securely to the wall and holds only lightweight items.