

How to Sterilize Baby Bottles Naturally in 2026
Table of Contents
- Why Sterilizing Baby Bottles Still Matters in 2026
- How Often to Sterilize Baby Bottles (and When Daily Is Enough)
- Step-by-Step: How to Clean Baby Bottles Before Sterilizing
- The Boiling Water Sterilization Method
- Natural Steam and Microwave Options for Bottle Parts
- Eco-Friendly Sterilizing: Vinegar, Lemon, and Water-Saving Tips
- When to Stop Sterilizing Baby Bottles
- Air Drying, Storage, and Avoiding Post-Sterilization Contamination
- Frequently Asked Questions
Last Updated: September 20, 2026
Why Sterilizing Baby Bottles Still Matters in 2026
A newborn's immune system is still developing, which makes feeding equipment a real concern for new parents. Learning how to sterilize baby bottles naturally in 2026 comes down to one simple idea: heat and acid can kill germs without harsh chemicals. This guide walks you through every safe method, step by step.
How Often to Sterilize Baby Bottles (and When Daily Is Enough)
Daily sterilization is enough for most healthy babies. A common approach is once every 24 hours, plus a fresh round after any illness in the house.
- Newborns (0-3 months): Sterilize daily, every day
- Babies 3-6 months: Daily is still a good habit
- Babies over 6 months: Daily or every few days works for most families
- After illness: Sterilize every bottle part before each use
- Premature babies: Follow your pediatrician's advice closely
Step-by-Step: How to Clean Baby Bottles Before Sterilizing
Cleaning comes before any sterilization method. Milk residue left on a bottle shields bacteria from heat, so the sterilizing step fails.
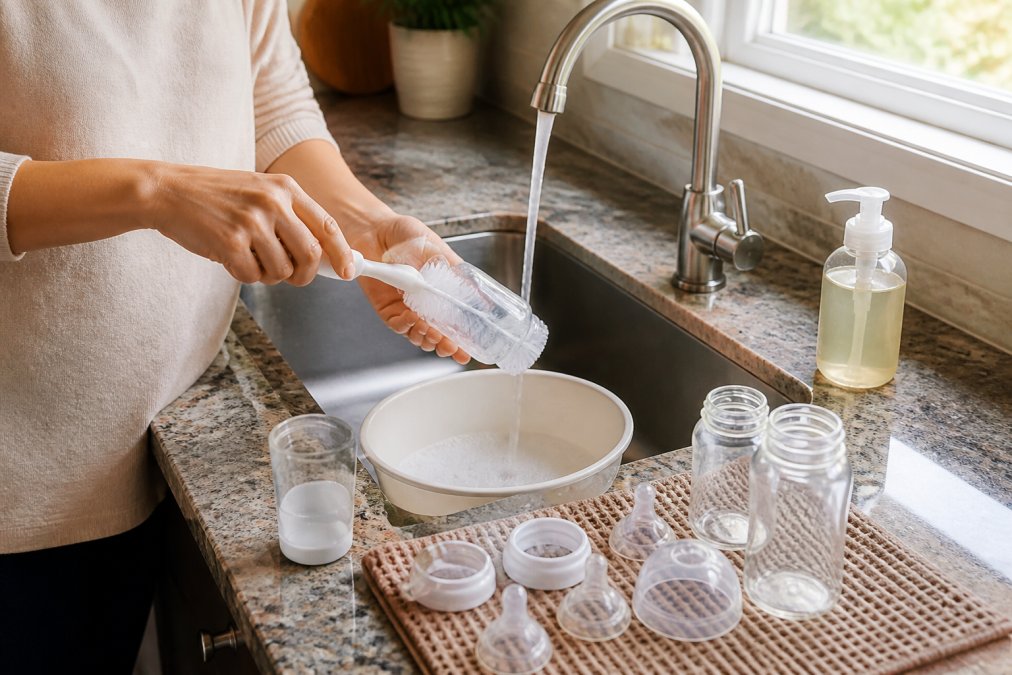
What You'll Need
- A bottle brush and a small nipple brush
- Mild dish soap
- Warm running water
- A clean basin or bowl
- A drying rack
Washing Bottle Parts by Hand
- Take the bottle apart completely. Separate the nipple, ring, cap, and any valves.
- Rinse every part under warm running water to remove leftover milk.
- Add a drop of mild dish soap to the brush.
- Scrub the inside and outside of the bottle.
- Push the nipple brush through the nipple hole from both sides.
- Rinse everything well until no soap residue remains.
Skipping the nipple brush is a common mistake. That tiny hole traps milk that a regular brush cannot reach.
The Boiling Water Sterilization Method
The boiling water sterilization method is the simplest option and needs no special equipment. It works on glass and on most heat-safe plastic bottles. The catch is that "heat-safe" is not one thing. Glass, silicone, and the plastics used in bottles all respond differently to a rolling boil, and the difference decides whether a bottle survives the process.
What Each Material Tolerates
- Glass: The most forgiving. Borosilicate and tempered glass handle repeated boiling without clouding or warping. Thermal shock is the real risk, so never move a hot glass bottle straight into cold water.
- Silicone: Nipples, valves, and silicone-sleeved bottles tolerate boiling well. Silicone can hold onto soap residue and odors, so rinse thoroughly before boiling.
- Polypropylene (PP): The most common bottle plastic. It is generally boil-safe, but repeated high heat accelerates clouding and surface scratching over months of use.
- PPSU: A sturdier plastic that resists heat and wear better than PP. It costs more and is often marketed for longevity, but it still has a manufacturer-stated heat ceiling.
- Polycarbonate: Older bottles may be made of this. Many parents now avoid it, and it is not the material to experiment with in a rolling boil.
Check the base of every bottle for a heat rating or a "boil-safe" symbol before you commit a full set to the pot.
Step-by-Step
- Fill a pot with enough potable water to fully submerge the bottle parts. Leave headroom so the water does not boil over.
- Bring the water to a rolling boil.
- Add glass bottles first, then plastic parts. Lower them in with tongs rather than dropping them, which prevents splashing and cracking.
- Boil for 5 minutes. Some manufacturers specify a shorter time for plastic, so follow the bottle's own instructions if they differ.
- Turn off the heat and let the parts cool in the water. Pulling hot plastic straight into cool air can stress it.
- Lift them out with clean tongs and place them on a clean drying rack.
Two Things That Change the Timing
- Altitude: Water boils at a lower temperature as elevation rises. At higher elevations, a 5-minute boil may not deliver the same heat exposure as it does at sea level. Adding a minute or two is a common adjustment.
- Hard water: Mineral-heavy water leaves a chalky film on bottles and nipples after boiling. A splash of white vinegar in the boiling water helps, but rinse everything well afterward so no residue carries into the next feed.
Safety Notes
- Never leave a pot of boiling water unattended with a baby or toddler in the room.
- Keep the pot handles turned inward on the stove.
- Do not pack parts tightly. Water needs to circulate around every surface.
- Discard any plastic part that warps, cracks, or develops a cloudy, rough interior. Those scratches harbor bacteria that no boil will reach.
Natural Steam and Microwave Options for Bottle Parts
Steam does the same job as boiling water without a pot on the stove. Both methods use heat alone, so no chemical residue is left behind.
Stovetop Steam
A covered pot with a steamer basket works well. Add water, bring it to a boil, and let the steam surround the parts for about 10 minutes. Keep the lid on so the steam stays trapped.
Microwave Steam Bags
Microwave steam bags are the fastest route. Add water to the bag, seal it, and follow the bag's timing instructions. The bag must be microwave-safe, and the parts must fit inside.
| Method | Time | Best For | Water Use |
|---|---|---|---|
| Boiling water | 5 minutes | Glass and heat-safe plastic | High |
| Stovetop steam | 10 minutes | Batch sterilizing several bottles | Medium |
| Microwave steam bag | 2-4 minutes | One or two bottles, quick turnarounds | Low |
| Chemical solution | 30 minutes soak | Cold sterilizing, travel | Low |
Eco-Friendly Sterilizing: Vinegar, Lemon, and Water-Saving Tips
Most guides on this topic jump straight to bleach or a ten-minute rolling boil. Neither is the only path, and neither is the lightest on your kitchen or your utility bill. This section covers what natural agents actually do, what they cannot do, and how to cut the water and energy cost of daily sterilization without cutting corners on safety.
What Vinegar and Lemon Actually Do
Vinegar and lemon juice are acids. They break down milk film, dissolve mineral buildup, and leave a fresh smell. They are excellent cleaners. They are not sterilizers on their own, because they do not reliably kill the full range of pathogens that heat does.
- Milk film: Add a splash of white vinegar to warm wash water. It cuts the fat residue that a brush alone can smear around.
- Cloudy bottles and mineral film: Soak in warm water with lemon juice or a diluted vinegar solution, then wash as normal. This is especially useful in hard-water areas.
- Odor: A short vinegar soak neutralizes sour-milk smell that lingers in silicone nipples and valves.
- Final step: Always finish with boiling, steam, or a microwave steam bag. The acid cleans; the heat sterilizes.
Cutting Water and Energy Waste
Boiling a full pot for one or two bottles is the least efficient routine in the kitchen. A few habits shrink both the water and the energy footprint:
- Match the pot to the load. Use the smallest pot that fully submerges the parts. A large pot for a single bottle wastes both water and the gas or electricity to heat it.
- Batch it. Sterilize once a day for the day's bottles rather than running a pot for each feed. Same heat, same water, more bottles.
- Reuse the boil water for the wash. Let it cool, then use it for the next hand-wash instead of running the tap.
- Choose steam for small loads. A stovetop steamer or microwave steam bag uses a fraction of the water a full boil requires, and the microwave run is short.
- Skip the pre-rinse marathon. Scrape and quick-rinse, then wash. Long hot rinses before washing waste water without improving the result.
- Air dry instead of towel drying. A drying rack costs nothing to run and avoids the laundry and lint of towels.
A Practical Low-Waste Routine
- Wash all bottle parts by hand with mild soap, using a splash of vinegar in the wash water for milk film.
- Once a day, sterilize the day's parts in one batch, steam if you have several, a microwave bag if you have one or two.
- Air dry on a dedicated rack.
- Store dry parts in a covered container.
That routine keeps the sterilization step intact while trimming the daily pot of boiling water down to a single, right-sized batch.
When Natural Cleaning Is Not Enough
If anyone in the house is sick, if a bottle has been left with milk in it for hours, or if you are feeding a premature or immunocompromised baby, skip the gentle routine and go straight to a full heat sterilization. Natural cleaning is a maintenance habit, not a response to a known contamination event.
When to Stop Sterilizing Baby Bottles
Most families can stop daily sterilization once a baby is past 12 months old and healthy. By then, the immune system handles everyday germs well.
Signs it is time to ease off:
- Your baby is over 12 months old
- Your baby puts toys and hands in their mouth without issue
- No one in the house is sick
- Your pediatrician says it is fine
Air Drying, Storage, and Avoiding Post-Sterilization Contamination
Post-sterilization contamination undoes all your work. A freshly sterilized bottle touched by dirty hands or set on a wet counter is no longer clean.
Follow these steps:
- Shake off excess water
- Place parts on a clean drying rack, nipple-side down
- Let them air dry fully before storing
- Store dry parts in a clean, covered container
- Wash your hands before handling sterilized parts
- Re-sterilize anything that falls on the floor
Frequently Asked Questions
At what age is it no longer necessary to sterilize baby bottles?
Most pediatric guidance suggests you can stop sterilizing baby bottles around 12 months old, once your baby is crawling, putting things in their mouth, and their immune system has matured. Before that, daily sterilization is recommended for healthy infants. If your baby was premature, has a weakened immune system, or your doctor advises continued sterilization, follow that guidance instead. After 12 months, regular hot soapy washing and thorough air drying is usually enough.
Can you use vinegar to sterilize baby bottles naturally?
Vinegar is a natural disinfectant and can help remove residue and odors, but it does not kill all bacteria and pathogens the way boiling water or steam does. A diluted white vinegar rinse (about 1 part vinegar to 3 parts water) can be used as a final rinse after washing, followed by a thorough rinse with potable water and air drying. For true sterilization, rely on boiling, steam, or a sterilizer unit. Vinegar works best as a complement, not a replacement.
Do pediatricians recommend sterilizing baby bottles for healthy infants?
Yes, most pediatricians and public health agencies recommend sterilizing baby bottles and feeding equipment for healthy infants, especially during the first few months and before first use. Newborns have developing immune systems, so reducing bacteria and germs on bottle parts, nipples, and feeding items helps prevent infection. Once babies reach about 12 months old and are more mobile, many pediatricians say consistent hot soapy washing and air drying is sufficient.
How often should you sterilize baby bottles in 2026?
For newborns and babies under 3 months, sterilize bottles and nipples daily, ideally after every use or at least once a day if you have multiple bottles. Between 3 and 6 months, daily sterilization is still common. After 6 months, some parents move to sterilizing a few times a week. By 12 months old, most families stop routine sterilization. Always sterilize new bottles before first use and any time a bottle has been stored for long periods or exposed to contaminants.
Sterilizing bottles does not have to mean harsh chemicals or a complicated routine. Pick one method, clean first, and dry and store with care. Tender Tots & Wellness offers a curated mix of baby gear and wellness products, high quality at a fair price, all with free worldwide shipping. Shop now and build a feeding routine that fits your family.